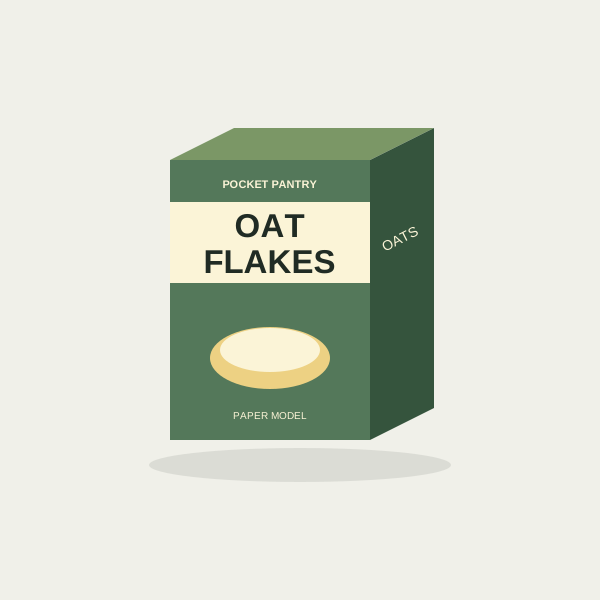
POCKET PANTRY / 01
Oat flakes
Printable miniature cereal box
Free PDF One model per sheet
A tall, narrow green carton with a cream label and a little breakfast bowl. The front flap closes over the shorter flaps to make a sealed pantry box.
Vector artwork · One page · Print at 100%
Illustrations show the intended result, not a physical sample.
A sleeve.
Then two closed ends.
The flat pattern has four body panels and one glue tab. At each end, the full-depth flap belongs to the front face.
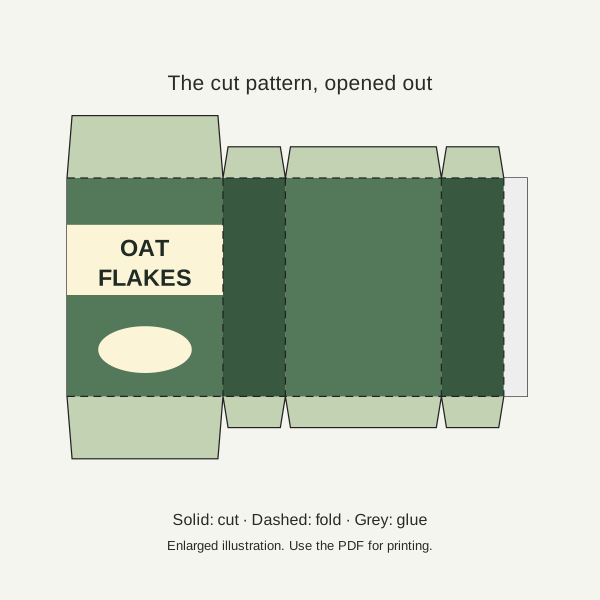
Wrap the four faces.
Fold with the artwork outside. The body widths go 20, 8, 20, 8 mm at 1:12. Join the grey tab behind the first panel. The four body faces make a 56 mm perimeter; the tab is extra.
Check that the short edges meet without twisting. If they overlap by a full tab width, the seam is in the wrong place. Let the sleeve hold its shape before closing the ends.
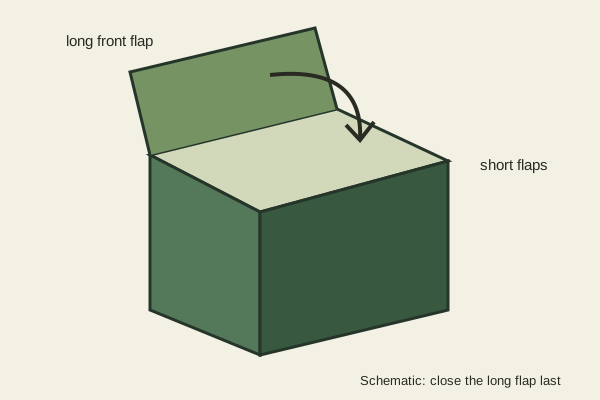
Before the second copy
If the top bulges, check for glue lumps and thick paper at the overlapping flaps. Try thinner stock or less glue before changing the artwork size. Enlarging only one face breaks the shared fold geometry.
At 1:6, the body becomes 40 × 56 × 16 mm and the seam tab becomes 6 mm. Use the separate 1:6 file; choosing a larger paper size alone does not change scale.
Find the error before gluing four faces.
Start with the 50 mm line, then check the body panels while the pattern is still flat. If a test line measures 48 mm, the print factor is 48 ÷ 50 = 0.96. The nominal 20 mm front is now 19.2 mm; the 28 mm body height is 26.88 mm. A neatly folded carton can therefore be consistently too small without any cutting mistake.
Adobe distinguishes Actual size from Fit: Fit may resize the page. Check the paper format and print scaling, then print and measure a new proof. Enlarging a screenshot until it looks right is not the same as preserving the PDF's dimensions.
The line is wrong
Resolve print scaling first. Do not alter the four panel widths independently, and do not compensate by moving one fold. The body, tabs and end flaps must remain in the same proportion.
The line is right, the sleeve is wrong
Check the 20 / 8 / 20 / 8 mm panel sequence. Fold on the dashed boundaries. The 3 mm glue tab goes behind the opposite panel; it does not become a fifth visible side. A diagonal top edge suggests the two ends were not aligned at the seam.
Make the shelf decision with clearance.
The 1:12 drawing is 28 mm tall before real-paper effects. In a 30 mm clear opening, the nominal spare height is 2 mm. A raised flap, glue build-up or uneven shelf can use part of that gap. Dry-fit your proof in the actual opening before making a whole row. Measure the clear space where the carton sits, including any lip above it.
Keep your first proof and note the filename, paper, measured check line and seam result. Change one cause at a time. These calculations describe the digital pattern; they are not a claim that a physical batch was assembled.