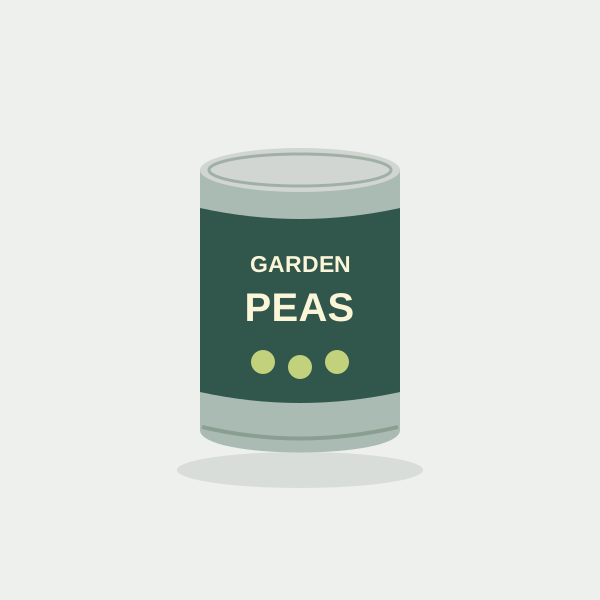
POCKET PANTRY / 02
Garden peas
Printable miniature food tin
Free PDF Body + two caps
A green paper cylinder with a silver-coloured rim and three little peas. Roll the body, join the seam and close it with separate paper circles. There is no metal and no food inside.
Vector artwork · One page · Print at 100%
Illustrations show the intended result, not a physical sample.
One gentle curve.
Two flat circles.
The body rolls without vertical creases. Eight small tabs at each end fold inward to support a separate circular cap.
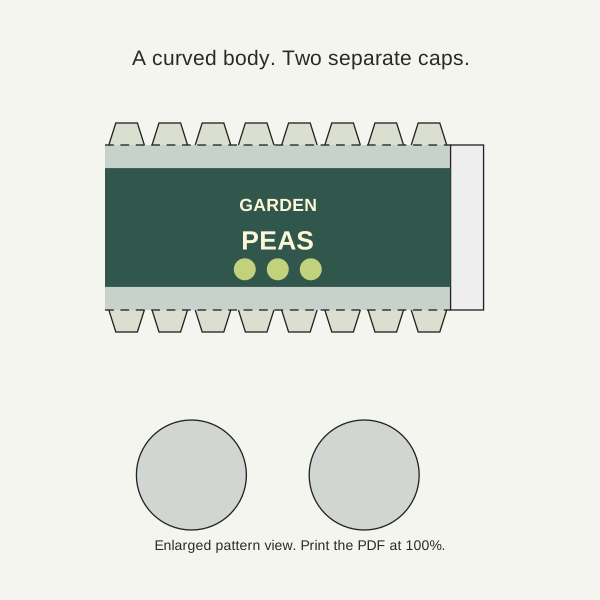
Roll to the seam line.
At 1:12, the printed body is 31.416 mm around: π × 10 mm. A separate 3 mm overlap makes the full strip about 34.416 mm wide. That overlap goes behind the opposite edge.
Gently pre-curve around a smooth round former. Line up both ends, then glue only the lap. If you use the full strip as the circumference, the nominal diameter becomes about 10.95 mm and the supplied caps will be too small.
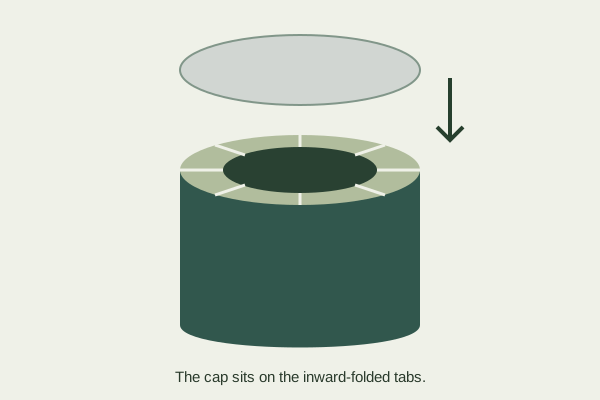
When a circle will not sit flat
A peaked cap often means a tab has stayed upright or too much glue is trapped underneath. Lift the cap before the glue sets and check the tabs individually. Keep the cut-out circles round; trimming them into many straight edges changes the fit.
The dimensions describe a zero-thickness drawing. Real paper adds thickness and the seam makes one spot thicker. Use a plain-paper proof and dry-fit; this is not a claim of a physically tested press-fit. The 1:6 file doubles the diameter, height and lap.
A cap mismatch can begin at the seam.
The seam in this drawing is a measured overlap, not spare material to discard. Diagnose the seam before changing either cap.
First check that the whole PDF printed at one scale. Then bring the seam to its marked boundary without gluing it and hold the cylinder as round as possible. Try both supplied circles. If both are similarly small, recheck the circumference. If one side sits proud, inspect the local tab beneath it rather than shrinking the whole cylinder.
Paper thickness is a separate variable.
The artwork uses zero-thickness geometry. A thick lap creates a local double layer, while the inward tabs add material below the cap. There is no single correction here that guarantees a fit for every stock. Make one plain-paper proof; if it closes but your heavier stock does not, the different material is useful evidence. Do not silently mix a 1:12 body and a 1:6 circle.
At 1:6, the intended diameter is 20 mm, circumference approximately 62.832 mm, and lap 6 mm. Both linear dimensions and the lap double together. A4 versus Letter only changes the sheet layout, not this scale. Return to the file selector above and choose the scale explicitly.